
Like the high tensile fence planning post, this is what my notes look like in CherryTree, the notekeeping program I use. CherryTree is free and works on windows, mac and linux.
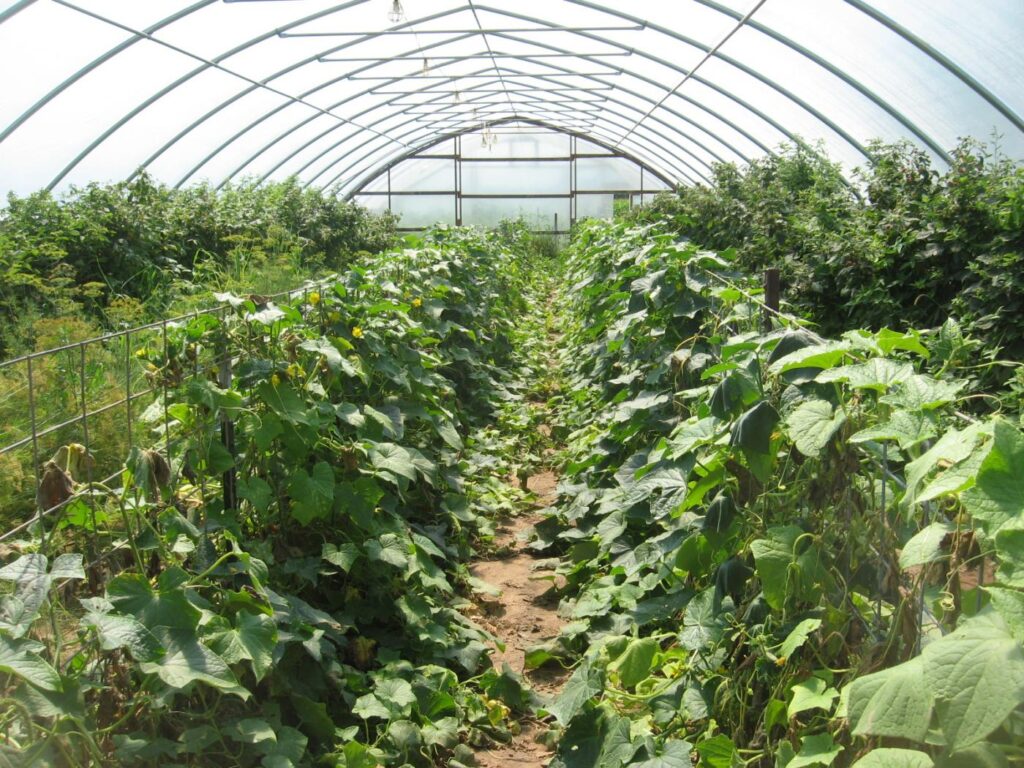
Time and wind got the best of a neighbor’s quonset hay shed and I got some of the curved steel pipe sections thinking of a high tunnel. I’ve pretty much got the design figured out.
Common Sizes
Farmtek economy model 20′, 26′ & 30′ wide x 24′, 36′, 48′, 72′, 96′ long Farmtek premium model 14′, 20′, 26′, 30′ wide x24′, 36′, 48′, 60′, 72′, 84′, 96′ long Most of the above are 12′ tall – premium also comes 10′ 6″ tall for their 14′ wide model (from hightunnels.org) What are the typical dimensions of a high tunnel? High tunnel dimensions range from 10-30’ width x 9-12’ height x up to 96’ length
24 pipes/sections
I have 24 sections of pipe that are 10 foot long. 5 or 6 foot truss spacing (http://zimmermanshightunnels.com/index.php/pricing/) farmtek is 4 foot for premium – 6 foot for economy
Three pipes
Gives me 8 trusses
5′ oc would be 35′ long
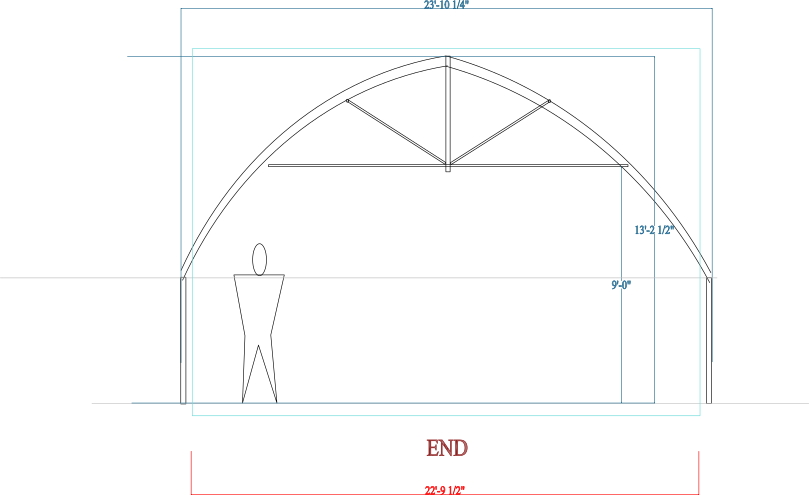
3 pipes is 75″ tall arc,(three pipes = 75″ deflection)
5′-6″ truss posts above grade + arch = 141″ or 11′-9″
5) Truss Style
There’s two common truss styles, quonset or gothic(which is really a gable with a curved peak & two flat roof pitches) but I ran across a custom greenhouse builder who actually does some that are more like a true gothic with a peak and rounded roof pitches so that’s what I’ll be going with. Might help with snow load which quonsets aren’t good for. I’m using three 10′ sections of curved pipe so I’ll have to notch, bend and weld the center section to form the slight peak. I may even fabricate something to act as a ridge board to give it even more strength and to keep the truss peaks all in a nice straight line. The shape will be something like below 
Here we go
– 3 pipe sections with middle one notched, bent and welded to form a slight peak 24′ x 33′ = 768 sq ft (840 x 2 = 1680 sq ft since it’s movable) Sides are 4′ – 6″ 5′-6″
Add 1 foot to heights below
Note to self. Measure how tall you are sitting on the tractor and insert crude likeness into the above drawing.
Bed Layout
I have no idea. I do have a small tractor but it’s got 24″ of clearance between the tires and it’s not an ag tractor; more like landscaping/turf so it doesn’t have much ground/crop clearance. I could use it to shape 24″ wide beds, lay plastic mulch and run drip tube all in one shot. I’ve thought about making some 2″ wheel spacers for the tractor which would give me 28″ beds. Those long straight beds are more efficient to put row covers on too. 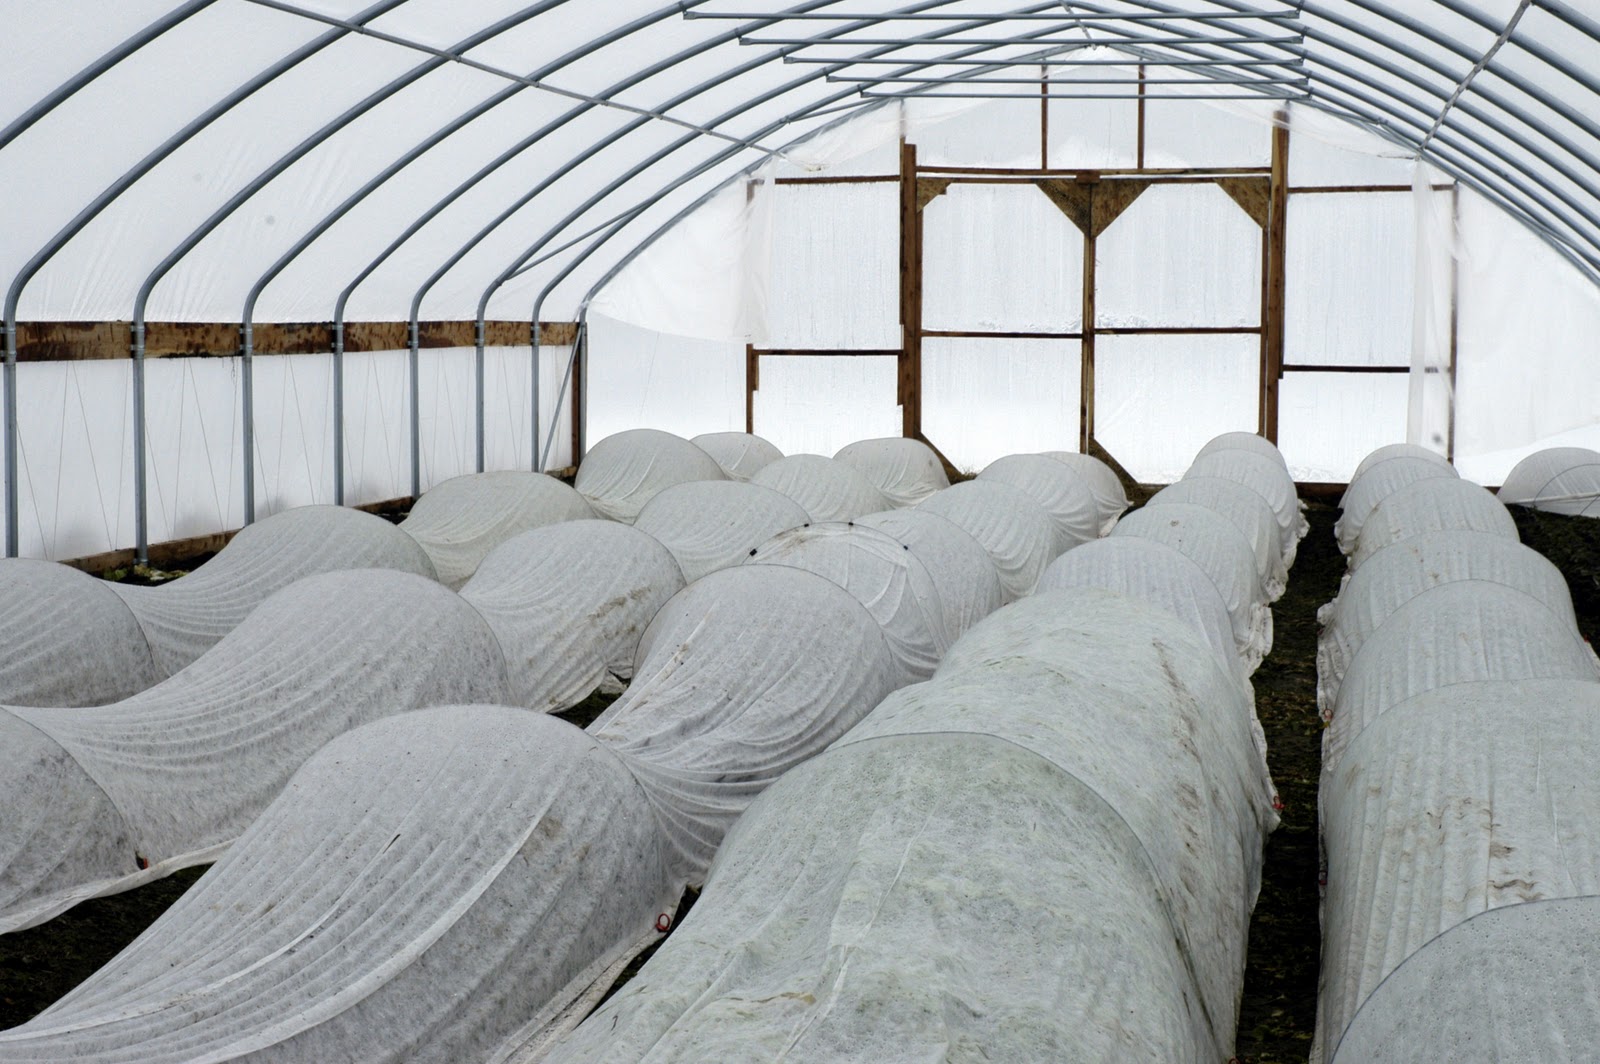
Great for growing all the same crop per row but this is to feed us, not to become market gardeners, although both would be nice. Beds going the other way are interesting but would be more manual labor and harder to design and install a drip system into.

Looks like they may be using a hose for something and I guess those are boards for walking paths?
Here’s Eliot Coleman style. Probably a bit much to start with. Pretty intensive and we’d probably get overwhelmed and exasperated. Now that’s a water hose. 
This one’s not bad. I could do without the green grid to trip on and the commercial mulch. Not sure about the lateral walkways. Good variety and still in long rows basically so some things can be done by machine. Hey look, another water hose. Everything I’ve read says one benefit of a high tunnel is that by using drip irrigation, there’s no more wet foliage which reduces foliar diseases. This begs the question, Why does everyone have a water hose? Spot watering? 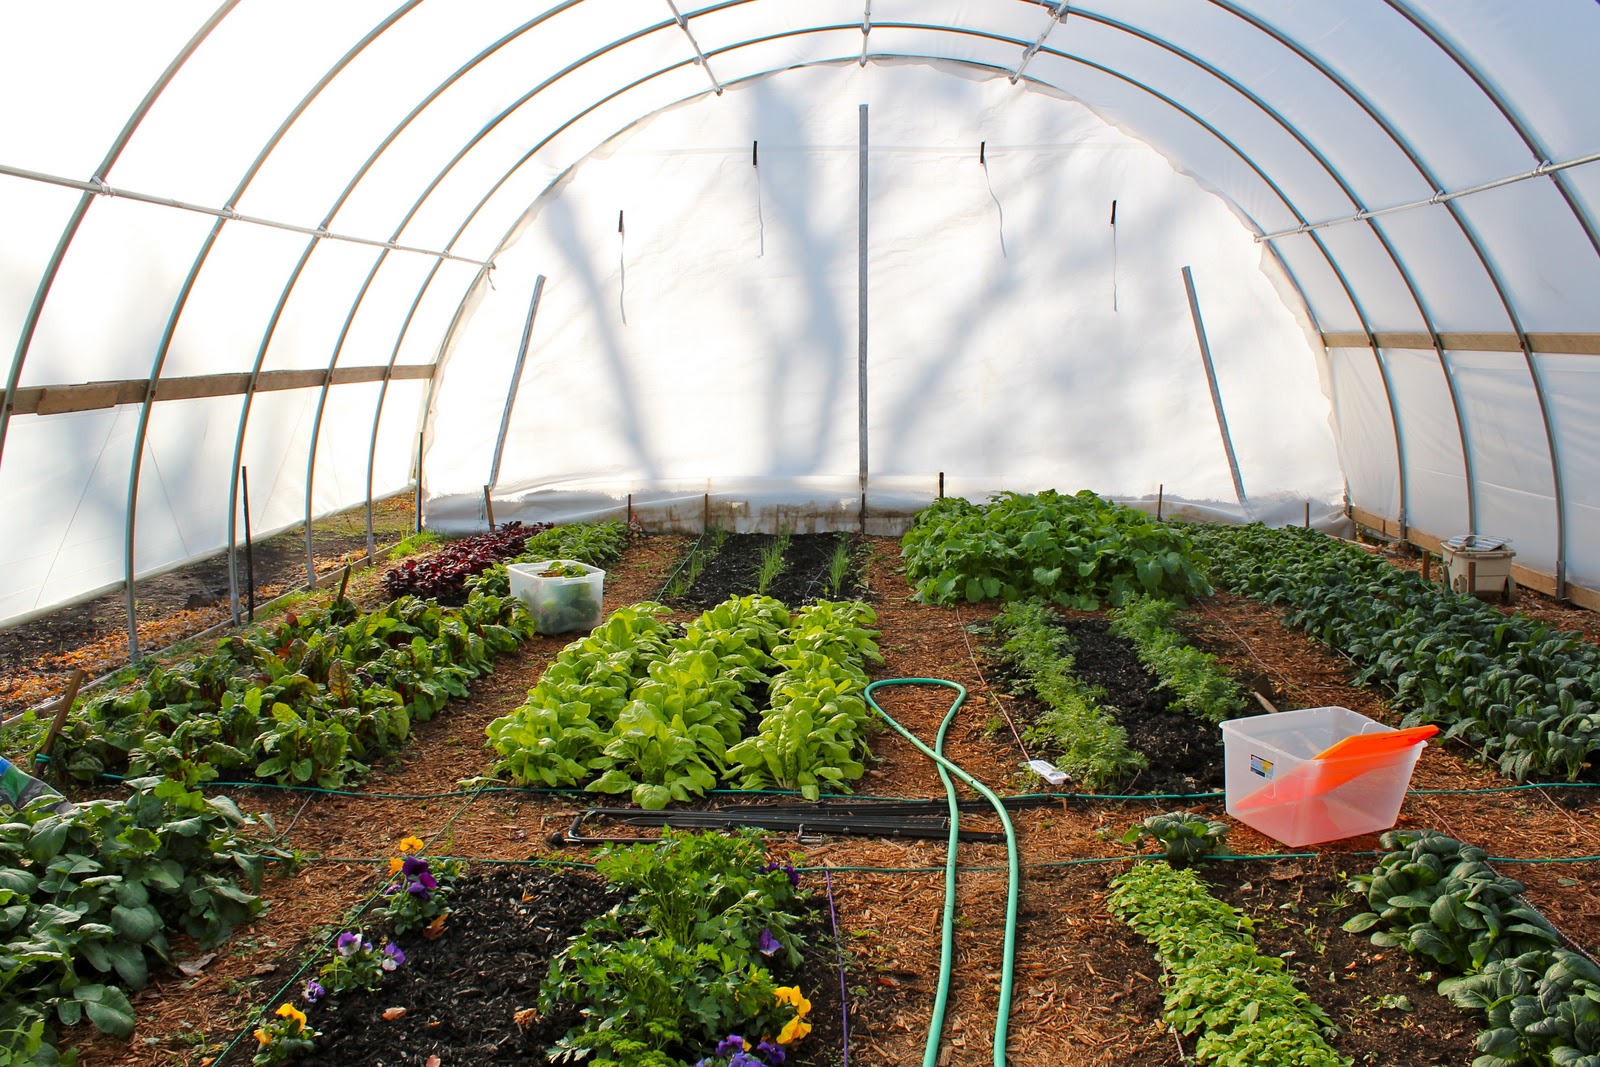
The more I’ve thought about it, I think something like above would work good. I can still use the tractor for bed shaping, laying drip tape and plastic mulch all in one shot and just not plant full length. Break it up with a few cross walks or just transition from one crop to another without a gap. I think one gap half way down the length might be handy though.
Irrigation
One thing that bothers me about plastic mulch and drip tape is that they’re both too fragile to be reused. That means throwing it away and buying new every year. Might as well shop for shoes at WM and buy tools from HF while I’m at it. I’ve read everything about high tunnels I could get my hands on but haven’t seen irrigation for movable tunnels addressed. Something else to ponder.
We don’t have a well yet so I go down the hill to a spring fed creek and fill a small tank that I tow behind the little tractor. Definitely going to have to harvest rainwater off of the tunnel. That would have to be run through a sand filter to use it for drip irrigation. Soaker hoses? PVC with tiny holes drilled in it and cover the PVC with mulch asap so the UV rays don’t disintegrate it? Whatever I use, it will be running off an RV water pump at 3gpm and 45psi or by gravity and a tiny amount of head pressure. Just did some quick window shopping and it comes to $221.00 for a small drip system with programmable timer. That’s using the drip tape that’s hard to reuse. A 1000′ roll has to be purchased and I figure 9 rows 32′ long x 2 for the tunnel being movable and that comes to 576′. (=288′) I’ll have to see if I can whittle that down to an even 250′ or 1/4 a roll. 8 rows @ 31′ works out to 496′. At $60/roll, that would be $15/yr which isn’t too bad. The rest of the components are more permanent although some of it is white PVC which will need to be kept shaded since it has no UV protection. Then in Spring and Fall, there’s always the occasional 22 degree night to worry about. That means a tank heater, the main supply line buried and all other components being inside the tunnel with some of it wrapped with pipe insulation(there’s my pvc shade) and the rest under floating row covers. Speaking of which.
Row Covers
The covering comes in three weights, light, medium and heavy with no thorough explanation as to what the different weights are for. Heavy comes in 500′ rolls, light in 50, 500, 1000′ and medium in 250′ or 500′. Need to keep in mind my 8 rows at 31′ mentioned above to utilize 250′ of drip tube. 8 rows x 31′ = 248′. That makes the 250′ roll of medium weight the best choice. Even that is $120.00 so I better be gentle with it and make it last for years and years. I’m starting to understand why most growers say they don’t increase profits with a tunnel, even though tunnels give nearly double the production of the same area of open field growing.
Total Cost
Well I’m at $500 for the tunnel film. I think I’ll pass on the $200 wiggle wire and track this time around and figure out a different way to attach it. Here’s the drip irrigation components and row cover material.
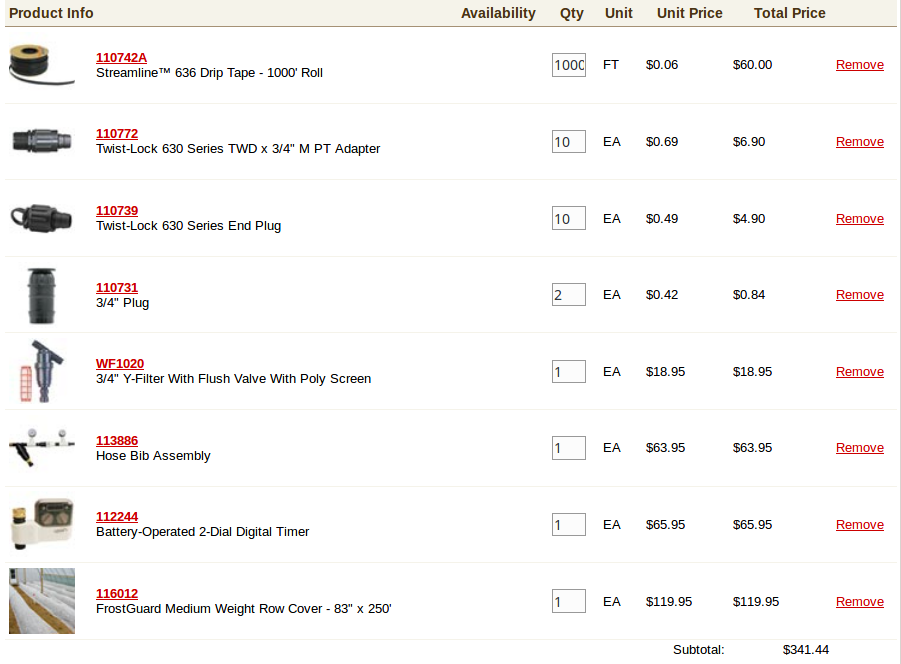
$500(film)+$341=might as well call it $900 and I still need pipe for legs and something for the legs to attach to and for the tunnel to roll on so we can call it $1000.00 if not a bit more.
Sun Master® Infrared Anti-Condensate Thermal Greenhouse Film
Infrared retention and anti-condensate additives mean superior diffusion rates, heat retention and tensile strength. This premier 6 MIL thermal film offers huge savings on energy costs. Keep the heat and lose the drips! • Co-extruded copolymer resin tri-layer construction offers maximum physical properties for superior film life. • Infrared (IR) additives provide excellent diffusion and absorb and re-radiate infrared heat back down to the crop during the evening hours, saving as much as 30% on heating costs. • Drip control additive is incorporated throughout the film and provides superior condensation control. • 88% light transmission. • 52% diffused light transmission means improved, more uniform plant growth. • UV stabilized for up to four years of film life. • Writing (this side to the soil) should be facing the inside of the greenhouse so you can read from inside the greenhouse. • Available in full rolls only. • Exclusive 4 year warranty.