
I was updating my Planning a High Tunnel post but it was getting long & messy and so much has changed due to a cover film price change of $170.00 where I had planned to buy it. I’m now going with Farmtek film as they’re more apt to have the same thing in 4 years when I need to replace it. Note To Self* Shop for deals and don’t forget Johnnyseeds.com, especially for row cover as they have a ton on clearance right now This new post will end up being my High Tunnel Build post with a quick outlay of da plan and materials needed. Due to the cost, I think I’m going to do it in two stages. The first stage will be to get it built and covered and grow something in it next year but I’ll be using straw mulch and watering it manually, probably with a soaker hose. The second stage will be outfitting it with rainwater collection, a pump, filtration, drip irrigation and growing under plastic mulch. That will happen in the following Spring, 2021. I’m wanting a decent height of 12-13 foot at the peak and to utilize the film in an economical way, with the size available, I’m having to narrow the tunnel a bit. It will now be 22 foot wide which will give the height to have my sides just under 4 foot as opposed to the 5 foot I had originally planned. My arched pipes are salvage from a time and wind damaged hay shed. The kind that have a vinyl cloth tarp on them and are quonset shaped. The pipes are thicker than what’s typically available for a high tunnel but also probably have a slighter arch due to the hay shed being 48 foot wide iirc. So to get my width and be able to take a little snow load, I’m using three of the 10 foot pipes and will notch and bend the center one which will give me a true Gothic shaped roof. I went out and set four pipes on the ground to mimic three. I needed to do it that way because I can’t notch and bend the center one until I know how much to notch and bend. Here’s some pics to help you understand what I’m talking about. I used some silver tape to mark the half way point of the two outer pipes. There’s two full length pipes butted together in the center. That gives me my three pipes lengthwise and allows me to adjust the peak angle which in turn changes the height at the peak and the width that the tunnel will end up. I didn’t quite get the right end where it meets the next pipe but that silver tape is the half way point aka 5 foot mark on the 10 foot pipe.
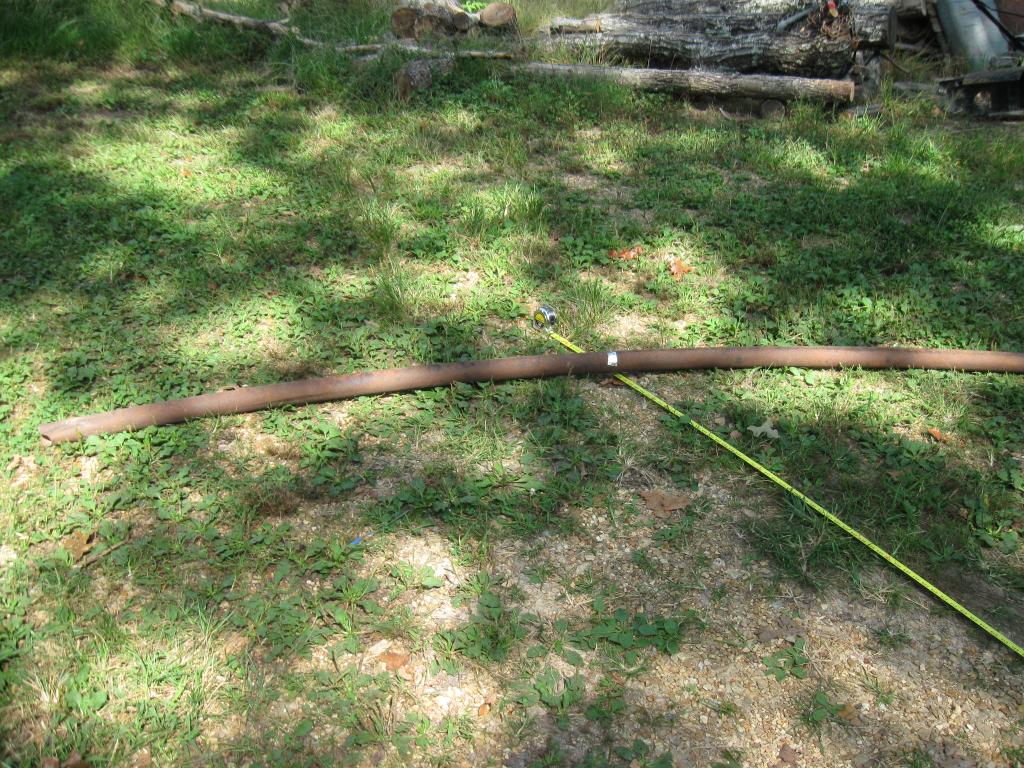
I’m looking for something around a 9-10 foot height so that when I add 3 1/2 foot uprights to set the arch on, I’ll get my 12-13 foot peak of the final tunnel. I’ve got my 25 foot tape measure going from one silver tape mark to the other for my width and then my little 12 foot tape measure to see what the height is. Two full 10 foot pipes meeting at the peak plus my silver tape at 5 foot on each end gives me 30 foot to put a top cover piece of film on and the film comes in 32 foot width which gives me something to grab and attach on the sides.
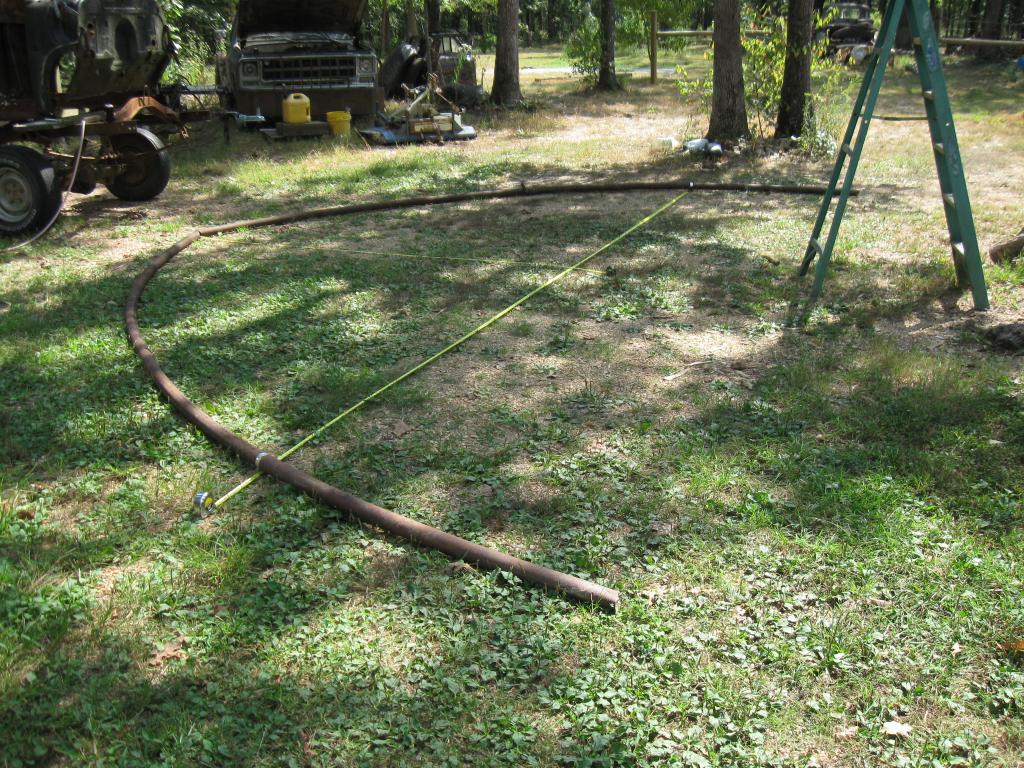
I ended up with a 22 foot width to get almost 10 foot at the peak. Even standing on a 6 foot step ladder, you don’t see the true peak due to the angle of this pic.

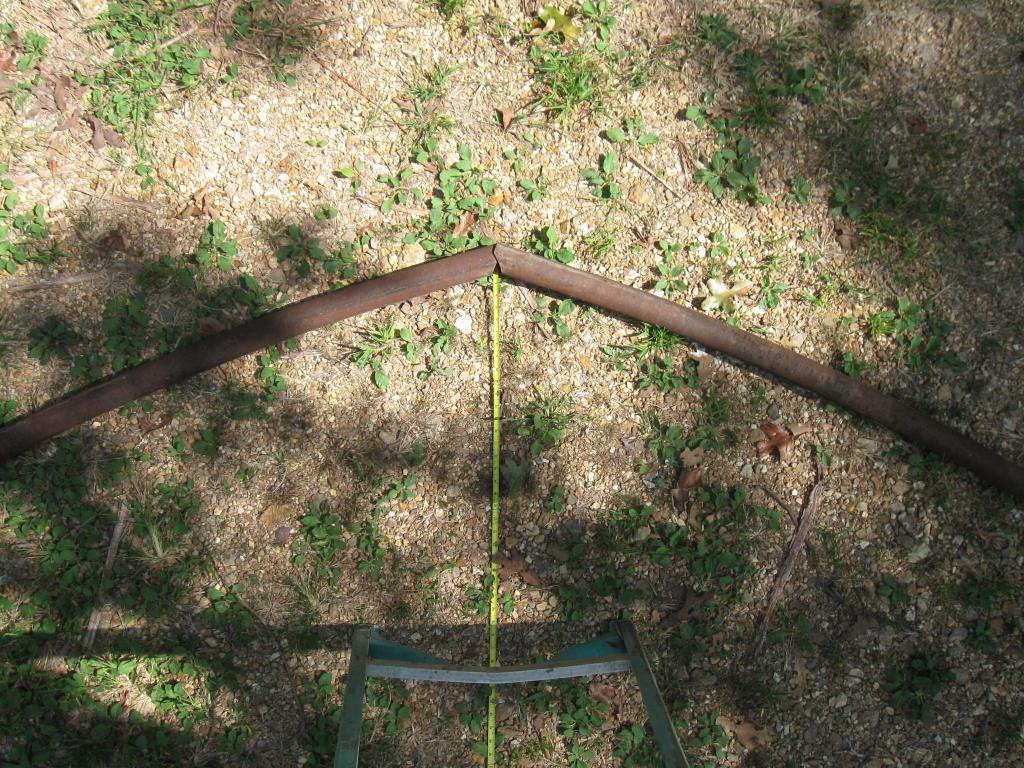
You can see the angle better here and I’m still on the step ladder but closer to looking straight down. Below is the angle I’ll need to cut and notch my center pipe to.
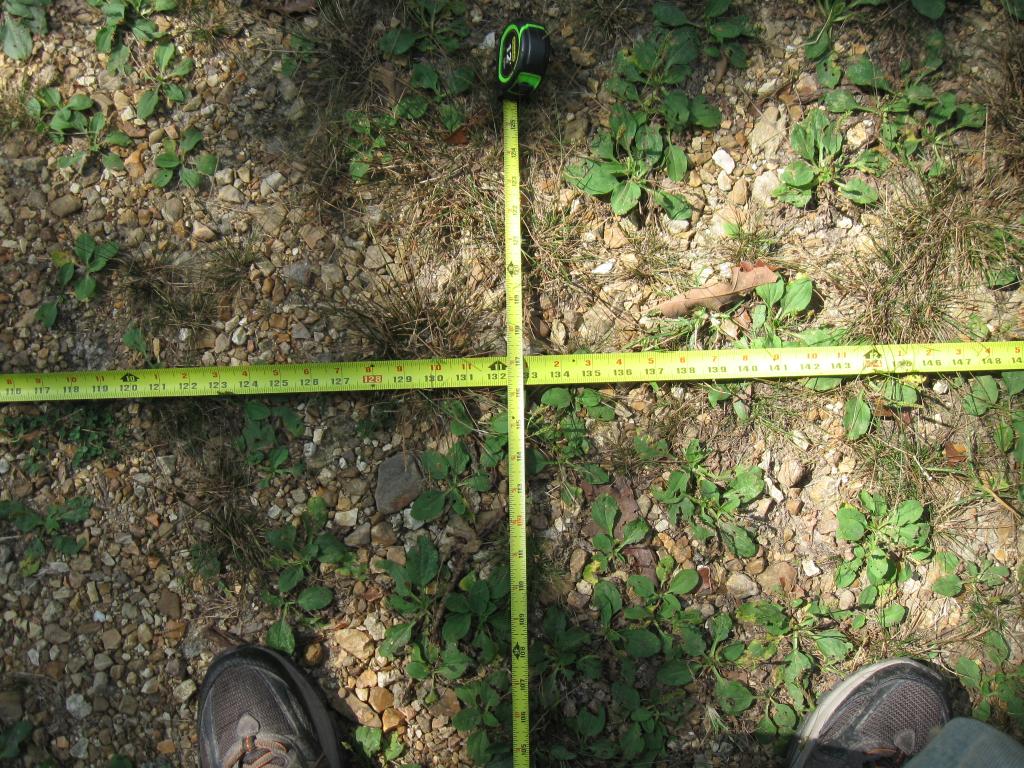
11 foot marks the middle of the 22 width and gives me 116/117 inch on the height. (The peak is behind me in the pic)
Basically something like below but now slightly narrower with a slightly sharper peak and shorter sides. The sides below are about 5 foot but will be 3′-6″ now. I’m not really sure what I’ll do for truss bracing. Below is just a thought and probably overkill. A single horizontal brace and maybe the vertical center one ought to be fine. It would be nice to have the horizontal one for attaching trellises but 9 foot is a little high off the ground. Something I can reach while standing on a milk crate would work. 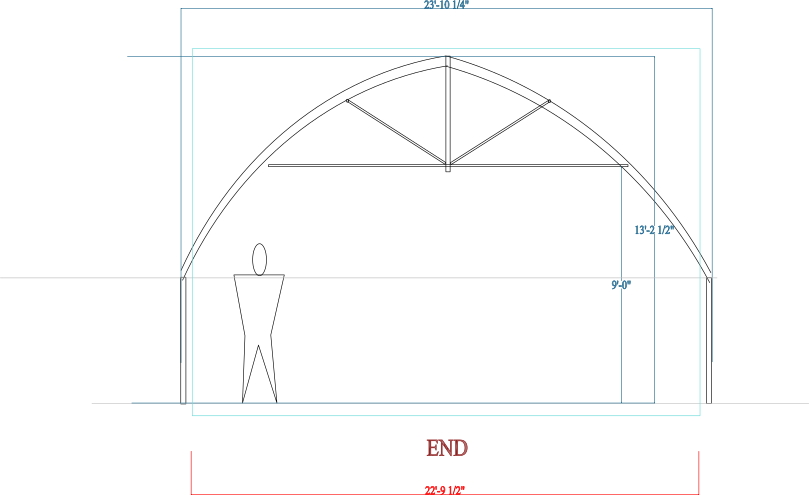
What the change in dimensions will do is allow me to buy the 32’x100′ film and I’ll have enough to completely cover the tunnel once and have leftover to re-cover the top/arch and the West/Northwest facing side since that will be getting hit with the hot afternoon sun and will degrade faster than the other side. It’s four year film so for $500, I can keep it covered for 8 years by having replacement for the top and one side. ($62.50 per year) Not sure about the Southern exposed end. If I make both ends the same, I could swap them in four years or make the North end solid and have leftover cover for a Southern end replacement. Southern is actually S/SE and Northern N/NW. I’ll have about 250 foot of row/bed length so the 2000′ roll of plastic mulch for $100 will also last 8 years. ($12.50 per year) and I’ll make sure it’s 250 foot of row Drip tape is $0.07/ft or call it 10 cents a foot so for 250 foot. ($17.50 per year) $62.50 (poly film) $12.50 (plastic mulch) $17.50 (drip tape) $92.50 per year plus shipping to keep in film, drip tape and plastic mulch. Makes me want to sell some veggies. We live in a bit of a recreational area due to the Meramec River and the Mark Twain National Forest where a lot of the land is owned by people from St Louis who come down for the weekends. Most of them show up on Fri afternoon so if I set up a veggie stand in the right spot, I might do pretty well. First I need to learn how to grow in a high tunnel … after I build it of course.